

Why a big bag in coral red?
My sister said a day to me : “I need a big big bag, a bag to go to my work, so I can put my lunch in it, my umbrella, my little handbag, a scarf, my glasses, and even more”. The process of creating a big bag in red coral started! I choose this colour just because I like all kinds of red.
DIY needs always good researching at first!

DIY needs always good researching at first, yes, it is always recommended to do some research before starting a project. I started looking at several social places, mostly on pinterest.com. There I made a board and pinned all kinds of bags on that board, I still use this board for other projects. I discovered that the most big bags are made of a kind of ribbon. So that was the first thing I had to know, which yarn I needed.
Thereafter I studied how they are made, and thought about the stitches I already know. With these knowledge I created one based on my known stitches. I spent a lot of time with trial and error, but eventually I found the right stitch!
Finally, I knew enough and I could start with pleasure on crocheting the big bag!
Materials I used
For this bag I used cotton ribbon yarn, I bought it here and I used a crochet hook number 5.
Description of the process proces

First rows 
Bag still without handles
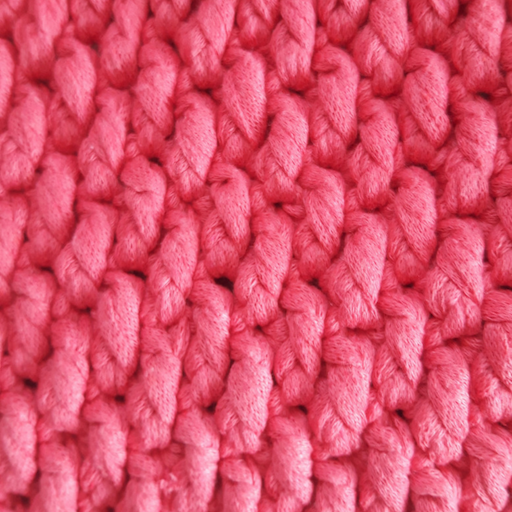
At first I made an oval bottom of single crochets. When the bottom was tall enough, I crocheted a border with uplifted single crochets. After this row I started the rows with the special stitch you see below.
When the bag was high enough I ended with a tour of single crochets. I finished with the handles. Here comes a tip : special about the handles is that it is all crocheted together with te last row, no, I did not cut off the thread so eventually I had no sew work at all, however sewing is not wat I like! Another tip is: crochet beginnings and endings of yarns together with the stitches when starting a new yarn. When using this technique you will see the result is even more beautiful!
Finished product
I’ll show the bag to my sister when I bring her a visit. Hopefully she likes it and she sees an opportunity to use it! But if she wants a bigger one, or another colour, it is no problem, the adjustments will not be very difficult, it’s only a matter of making the bottom taller and making some more rounds!
Interested in this bag, please take a look in my etsy shop or click on bags. If you subscribe to my newsletter you get a little surprise when ordering. If you want to know more about this bag, or you want another size, these adjustments are not difficult to me at all, just send me a mail !
See you soon in one of my other posts or in my newsletter!

