This basic pattern will help you on your way to crochet beautiful bags
Lees hier verder in het Nederlands.
Story
I always like to crochet a bag, hence my name handmadeRose–BAG. When I crocheted the first bags, it was always a bit of work to find out how I would crochet the handles. Either I crochet a bag where the handles form a whole with the bag or I crochet separate handles. In the beginning I was always a bit scared to crochet separate handles, but now that I have this basic pattern, the choice is easier to crochet a bag with separate handles. They sometimes also give an extra touch to the bag. This is the case for the bag I’m working on and for which a pattern will follow later!
I will keep this pattern handy from now on for when I crochet a bag, so that I don’t have to reinvent it again and again 
It is also very easy to make variations on this pattern, for example longer ropes, or also a different shape for the attachment points. This depends on what best suits the pattern of the bag of course.
Material
- drops safran : 1 ball if you crochet everything in 1 color or 2 balls in different colors if you crochet handles as in this example
- hook pin nr 3.5 mm
Used stitches
- chains
- simple crochets (sc)
- foundation chain of sc (can also be replaced by a chain of chains and 1 row of sc)
Pattern
The rope
Crochet a foundation chain 140 sc or 90 cm long if you use a different yarn as indicated. You can also replace the foundation chain with a chain of 140 chains and 1 row of sc.
Then crochet 3 more rows of sc. Close but don’t cut the thread short so that you can use that thread to sew the tube closed.
Make a long tube by sewing the long ends together with an invisible stitch. If you want the handle to be very sturdy, you can put an iron wire through this tube. Then sew the 2 short ends closed as well, also as invisible as possible.

Firming piece
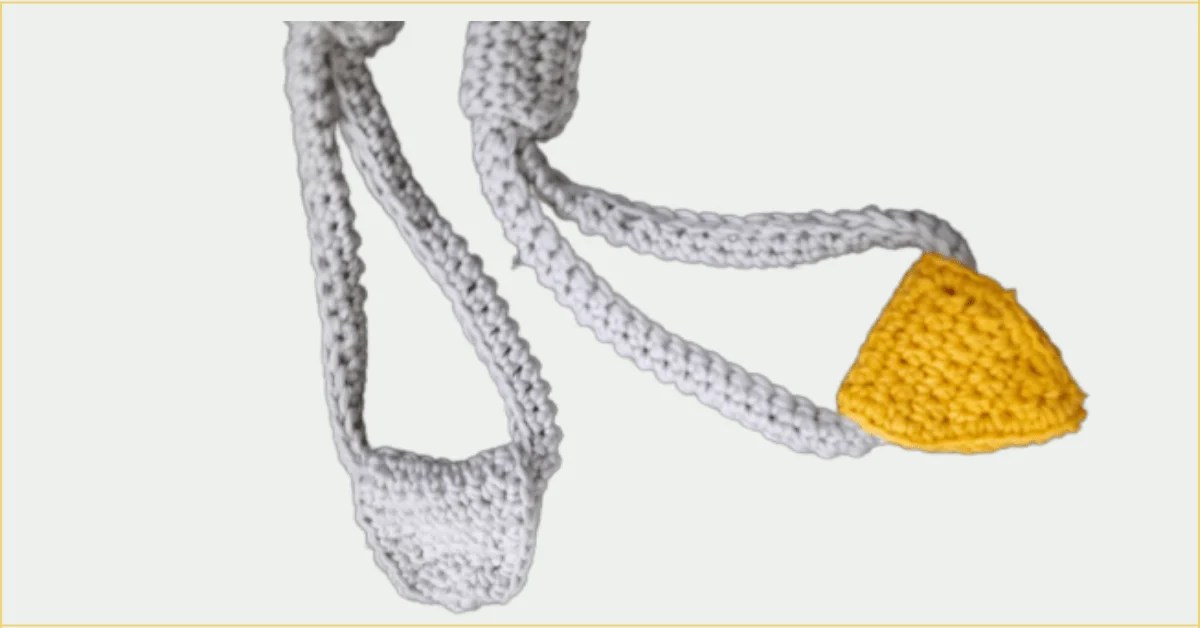
Crochet another foundation chain with 35 sc. Then work 9 more rows of sc. Wrap this piece around the rope and secure the two longest ends with sc. Close.

Attachment points
Crochet 2 attachment points as described in the table below.
| rijnr | instructie |
|---|---|
| 1 | ch 2 (counts as 1st st), 1 sc in the first st, 2 sc, we have 4 sc |
| 2 | ch 2 (counts as 1st st), 1 sc in the first st, 3 sc, we have 5 sc |
| 3 | same as 2, but now we have 6 sc |
| 4 | same as 3, but now we have 7 sc |
| 5 | same as 4, but now we have 8 sc |
| 6-16 | work 10 rows with 8 sc |
| 17 | ch 2 (valid as 1st sc), 1 sc, skip 1 stitch, work 5 more sc, we will have 7 sc left |
| 18 | same as row 17, now we have 6 sc left |
| 19 | same as row 18, now we have 5 sc left |
| 20 | same as row 19, now we have 4 sc left |
| 21 | same as row 20, now we have 3 sc left |
| 22 | work 1 row with 3 sc |
| 23 | Fold the fastening point around one end of the tube as you can see in the photo below and crochet the ends with 3 sc. |
| 24 | Crochet around the attachment point, see also photo below |


Finally
This is my basic pattern for making handles. Variations are of course possible, you can make the rope thicker by crocheting more than 4 rows of sc, for example. Or, an attachment point can also be square depending on what best suits the model of the bag, but the idea is always the same, crochet a rope, crochet a reinforcement piece to make it more comfortable to wear and keep the rope together and provide attachment points!
There you go, have fun crocheting your bags and handles!
xox Greet
Gallery


