
Story
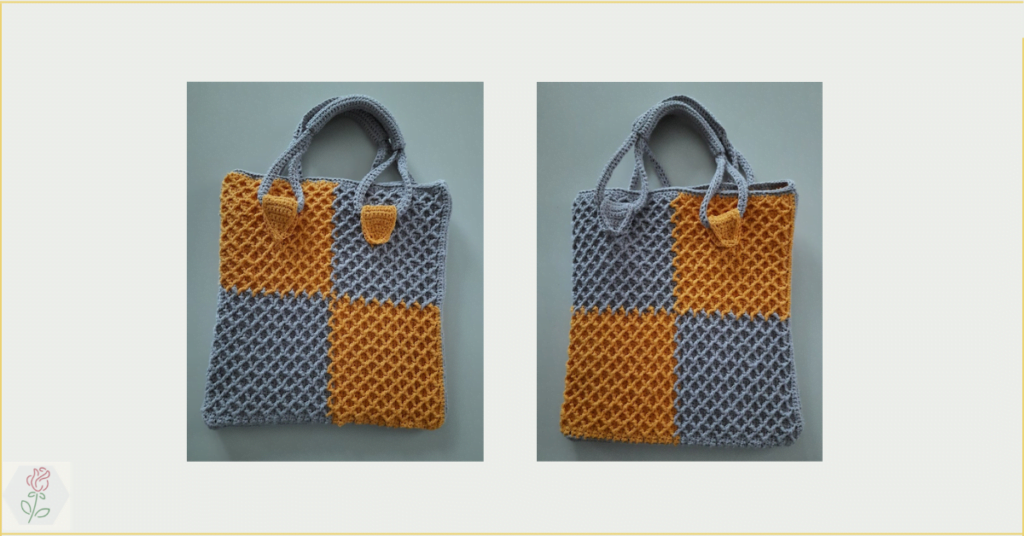
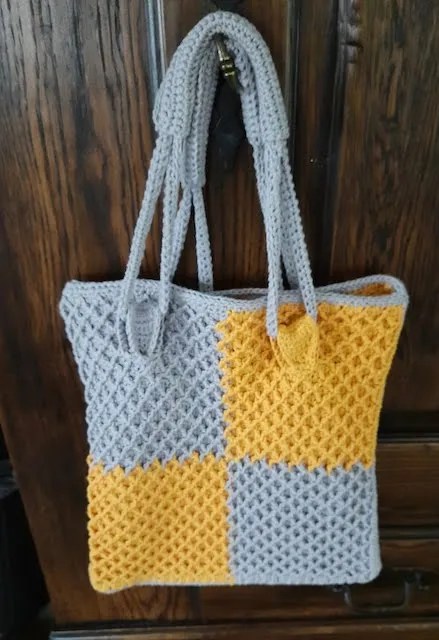
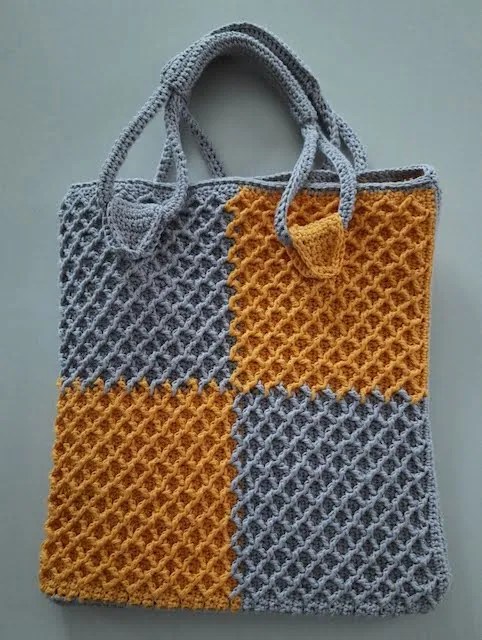
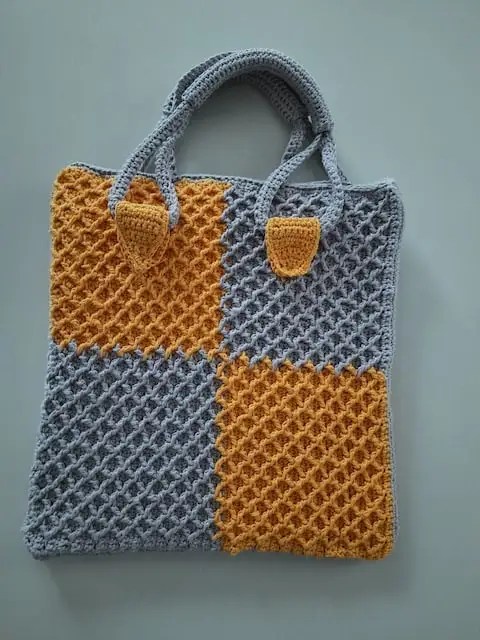
Our iPad has a case, again boring black, so time to brighten it up too! This bag is really handy, even with the case the iPad fits nicely in it. The yellow color also makes it striking, everyone in the house now knows where the iPad has ended up again and that makes it really handy! 
Lees hier verder in het Nederlands.
Material
- hook nr 3,5 mm
- drops safran, two balls of gray, two balls of yellow
Stitches
- sc
- foundation chain with sc
- the rib stitch, here you can learn the rib stitch.
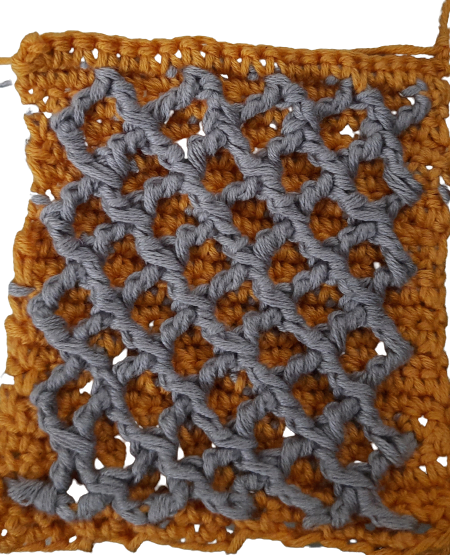
- diamantsteek : uitgebreide uitleg kan je vinden in onderstaande post!
Gauge
Make a square of 9cm x 9cm in diamond stitch. Start with a foundation chain of 22 sc followed by 1 row of sc. Thereafter crochet 20 rows.
Pattern
Crochet 2 squares in diamond stitch
Start with a foundation chain of 66 sc, of which 33 stitches in yellow, then 33 stitches in gray. When changing colors, make sure that the yellow thread is in front of your work. See photo for this.
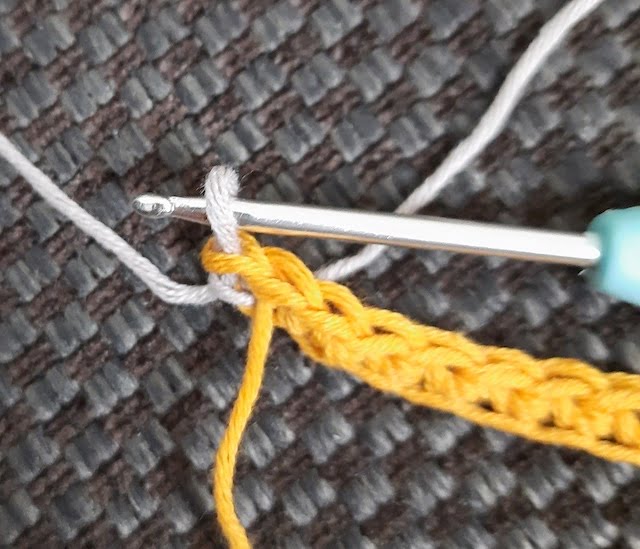
Then crochet another row of single crochets and then start with the second color. Always make sure that you put the ‘old’ thread in front of you when you change color.
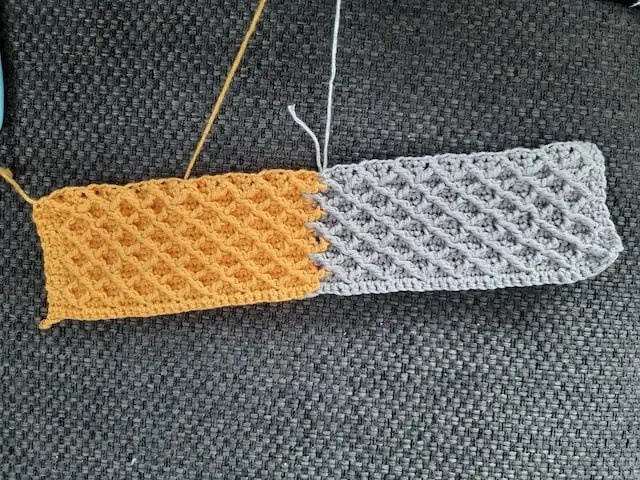
Crochet 6 sequences. Then cut the wires and switch the colors. Crochet 6 sequences again. Below you will find a photo series on which you can follow this well.


Do not cut the gray wire. We use this wire to border the square. Each square is bordered in gray with sc. After this row of single crochets work 2 more rounds with the rib stitch.


Then work the two squares together with single crochets on the inside of the bag. Turn the bag over and pull the bag into shape! Now all we have to do is attach handles to it.


Crocheting the handles
You can follow the crocheting of the handles in the post below.
Sew these handles securely to each square.
This is the result!


So, this is the pattern! Have fun crocheting this bag! And above all, your iPad deserves a nice jacket!
xox Greet