
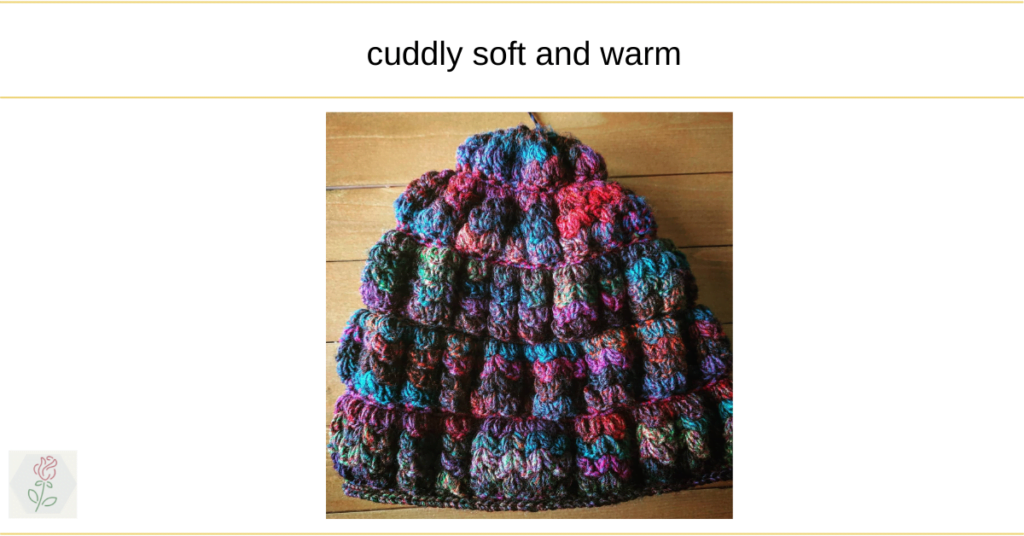
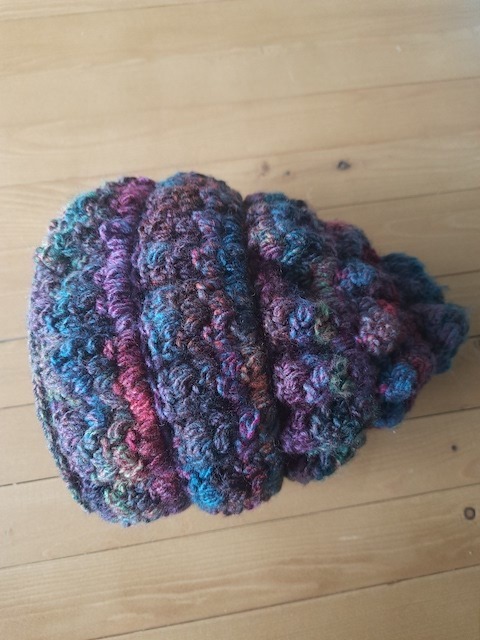
First of all, I would like to refer to my etsy shop anyway. Because if you love handmade accessories, but don’t have the time to make it yourself, then you can go there! In this winter collection you will find the super puffed beanie!
Ben je meer vertrouwd met het Nederlands? Klik dan hier!
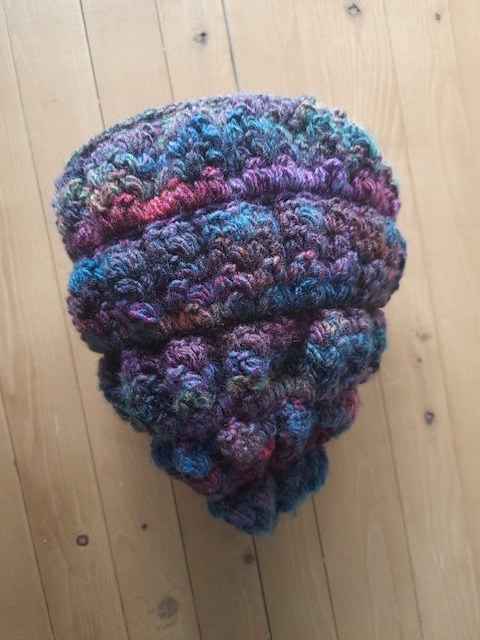
With the V-puff stitch I also made another beanie as you can see below!
Now I have designed and crocheted a new beanie, a beanie that feels even cozier and warmer. To achieve this I tried out another sample. This new stitch doesn’t really differ from the usual V-pff stitch. It’s not even a different stitch, it’s the same V-puff stitch, but with a few simple tricks the stitch just got thicker and softer!
Here you will find a summary of all these two tricks!
- Make more V-puffed stitches on the same base of chains
- Pull V-puffed stitches close together with single crochets
Yes, it is indeed nothing more than that. If it is not quite clear what I mean by these 2 techniques, it will certainly become clearer in the table below or when you are crocheting the hat. But rest assured, you will apply the techniques without even realizing it.
Pattern
Material
- I worked with the cookie yarn from hobbii.nl, this is a medium yarn, 100% acrylic. I love to crochet, it looks a lot like wool, but I like it better because it is not irritating. That is also a nice plus for wearing the hat, and therefore more pleasant when crocheting 😃
- hook 4.5
Stitches
- V-puffed stitch : if you don’t know how to crochet V-puff stitch, you can learn it here.
- single crochet
- slipped stitch
- magical ring : if you are nog familiar with a magical ring, you can follow this link to learn. In this post I learn you to make flower pots! If you perfer not start with a magical ring, it is also possible to crochet a chain with 6 stitches.
Gauge
I use the same gauge as in one ofs my previous posts, an easy pattern to crochet another beanie.
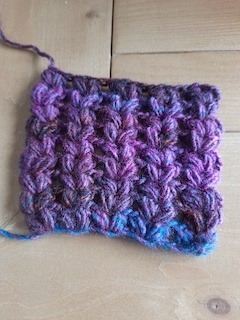
Start with a chain of 18 stitches + two stitches extra. Make a first puff -stitch with tree loops in in the third chain. Make another puff-stitch in same stitch. Skip one stitch and make another V-puff -stitch (two puff stitches in the same stitch). in the next stitch. After the 5th V-puff stitch turn and start another new row. Make V-puff-stitches in de middle of the V-puff stitches of the previous row. You should get a square of 10cm by 10cm.
Pattern
And now it is time for the pattern. I made a table, each row in the table explains which stitch to use, how many stitches has to be increased, how to increase and the total of stitches you should have.
| tour | stitches | number of increases | total number of stitches | remarks |
| Magical ring | ||||
| 1 | Single crochet | 0 | 6 | |
| 2 | Puffed stitch | 0 | 6 | Start with 2 chains. Make a puff stitch on every single crochet. Close the round with a slip stitch |
| 3 | V-puffed stitch | 0 | 6 | Start with 2 chains. Make V-puff stitches from the puff stitches. To do this, make 2 puff stitches in 1 puff stitch from the previous round.Close the round with a slip stitch |
| 4 | V-puffed stitch | 6 | 12 | Start with 2 chains. Increase with a v-puff stitch for each v-puff stitch from the previous row. Close the round with a slip stitch |
| 5 | V-puffed stitch | 6 | 18 | Start with 2 chainsIncrease with a v-puff stitch after each v-puff stitch from the previous row. Close the round with a slip stitch |
| 6 | Single crochet | 0 | 18 | Start with 1 chainWork a single crochet in every v-puff stitch from the previous round. Close the round with a slip stitch |
| 7 | Single crochet | 0 | 18 | Start with 1 chainWork a single crochet in every single crochet from the previous round. Close the round with a slip stitch |
| 8 | V-puffed stitch | 0 | 18 | Start with 2 chains. Work a v-puff stitch in every single crochet from the previous round. Close the round with a slip stitch |
| 9 | V-puffed stitch | 6 | 24 | Start with 2 chains. Start increasing for the 1st v-puff stitch from the previous round.Then increase every 3 V-puff stitches. Close the round with a slip stitch |
| 10 | V-puffed stitch | 8 | 32 | Start with 2 chains. Do not start to increaseIncrease every 3 V-puff stitches and finish with an extra V-puff stitch. Close the round with a slip stitch |
| 11 | V-puffed stitch | 10 | 42 | Start with 2 chains. Start increasing Increase every 3 V-puff stitches and finish with an extra V-puff stitch. Close the round with a slip stitch |
| 12 | Single crochet | 42 | Start with 1 chainWork a single crochet in every v-puff stitch from the previous round. Close the round with a slip stitch |
| 13 | Single crochet | 42 | Start with 1 chain. Work a single crochet in every single crochet from the previous round.Close the round with a slip stitch | |
| 14 | V-puffed stitch | 42 | Start with 2 chains. Make a v-puff stitch on every single crochet from the previous round. Close the round with a slip stitch | |
| 15 | V-puffed stitch | 6 | 48 | Start with 2 chains. Start with an increaseIncrease every 7 V-puff stitches. Close the round with a slip stitch |
| 16 | V-puffed stitch | 4 | 52 | Start with 2 chains. Increase after the 12th, 24th, 36th and 48th V-puff stitchClose the round with a slip stitch |
| 17 | V-puffed stitch | 52 | Start with 2 chains. Work a V-puff stitch on every V-puff stitch from the previous round. Close the round with a slip stitch | |
| 18 | Single crochet | 52 | Start with 1 chain. Work a single crochet in every v-puff stitch from the previous round.Close the round with a slip stitch | |
| 19 | Single crochet | 52 | Start with 1 chainWork a single crochet in every single crochet from the previous round.Close the round with a slip stitch | |
| 20-21-22-23 | V-puffed stitch | 52 | Like round 17 | |
| 24-25 | Single crochet | 52 | Like rounds 18 and 19 | |
| 26-27-28-29 | V-puffed stitch | 52 | Like round 17 | |
| 30-31 | Single crochet | 52 | Like rounds 18 and 19 |
Did you notice the two tricks I mentioned earlier in the pattern?
The first trick is achieved by not skipping any single crochet with V-puff stitches (example round 8). In this way you crochet the stitches very close together.
The second trick is done by working just a single single crochet on a V-puff stitch. In this way you crochet the V-puff stitches from the previous round very tightly together.(example round 7).
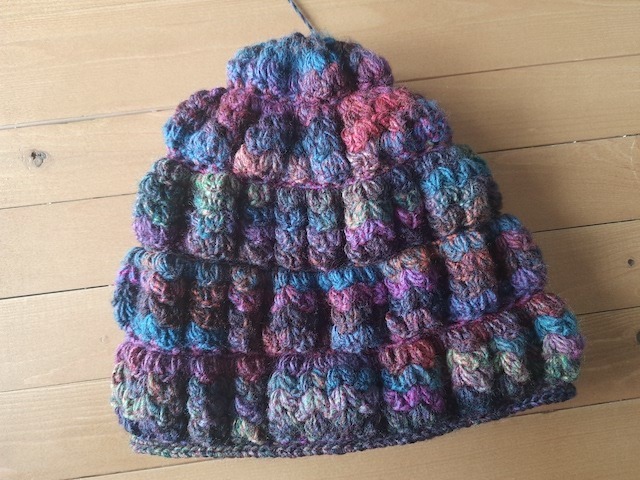
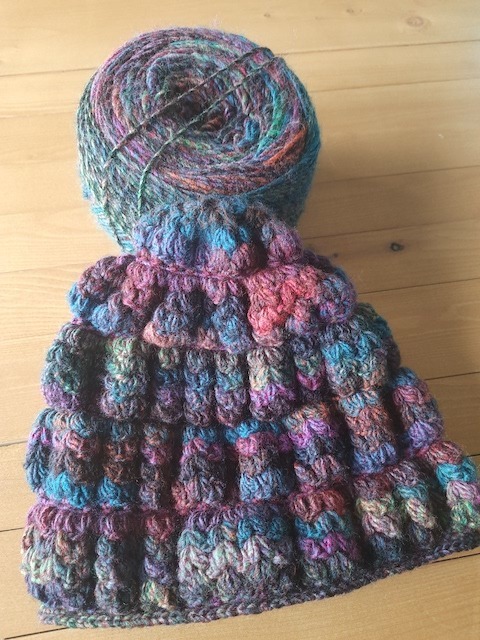
While crocheting the beanie I made some images. Here I show them so you can see a reference to your own work.


And to make this post complete I tractate you to a gallery of pictures of this super warm and soft beanie!

Have fun when crocheting this beanie! I made it with love and passion.
xox Greet